lora gateway raspberry pi shield
LoRa became a very powerful wireless communication interface that gives the way to build big scale wireless networks containing hundreds and thousands of devices. Used topology is a star when all nodes send information to web server through some amount of gateways. The most interesting feature of LoRa interface that one gateway can handle thousands of nodes at the same time without any collision. Not like in car alarm system with point to point communication between car and key chain. Here described steps to use lora gateway raspberry pi shield to transform your Raspberry Pi v2/3 to fully functional multi-channel lorawan gateway.
Another advantage of LoRa interface is communication range between end node and gateway – up to 15 kilometers. LoRa interface well suited for applications that need to pass just up to few hundred bytes per day from node to web server. E.g. for low data generation applications. It can be counted as disadvantage. But in other hand it gives you way keep nodes in sleep modes more than 99% of life cycle so you get devices that able to work up to 5 years from single Li-SOCl2 battery. It means that only end node can initiate communication session. It is true. It is about LoRa.
LoRaWan is communication protocol used over LoRa interface.
Prototyping using lora gateway raspberry pi shield
What do we need to start prototyping own LoRa network?
Not much. LoRa network contain three main parts:
1. web-server
TheThingsNetwork for fast prototyping. TheThingsNetwork stack V3 or LoRaServer if you need to deploy your own private gateway. Last one can be deployed in few minutes by typing following command in you Linux driven PC:
But current post not about this part of LoRa network. I am going to describe it lately.
2. end nodes
any end node that implement required functionality.
3. lorawan gateway.
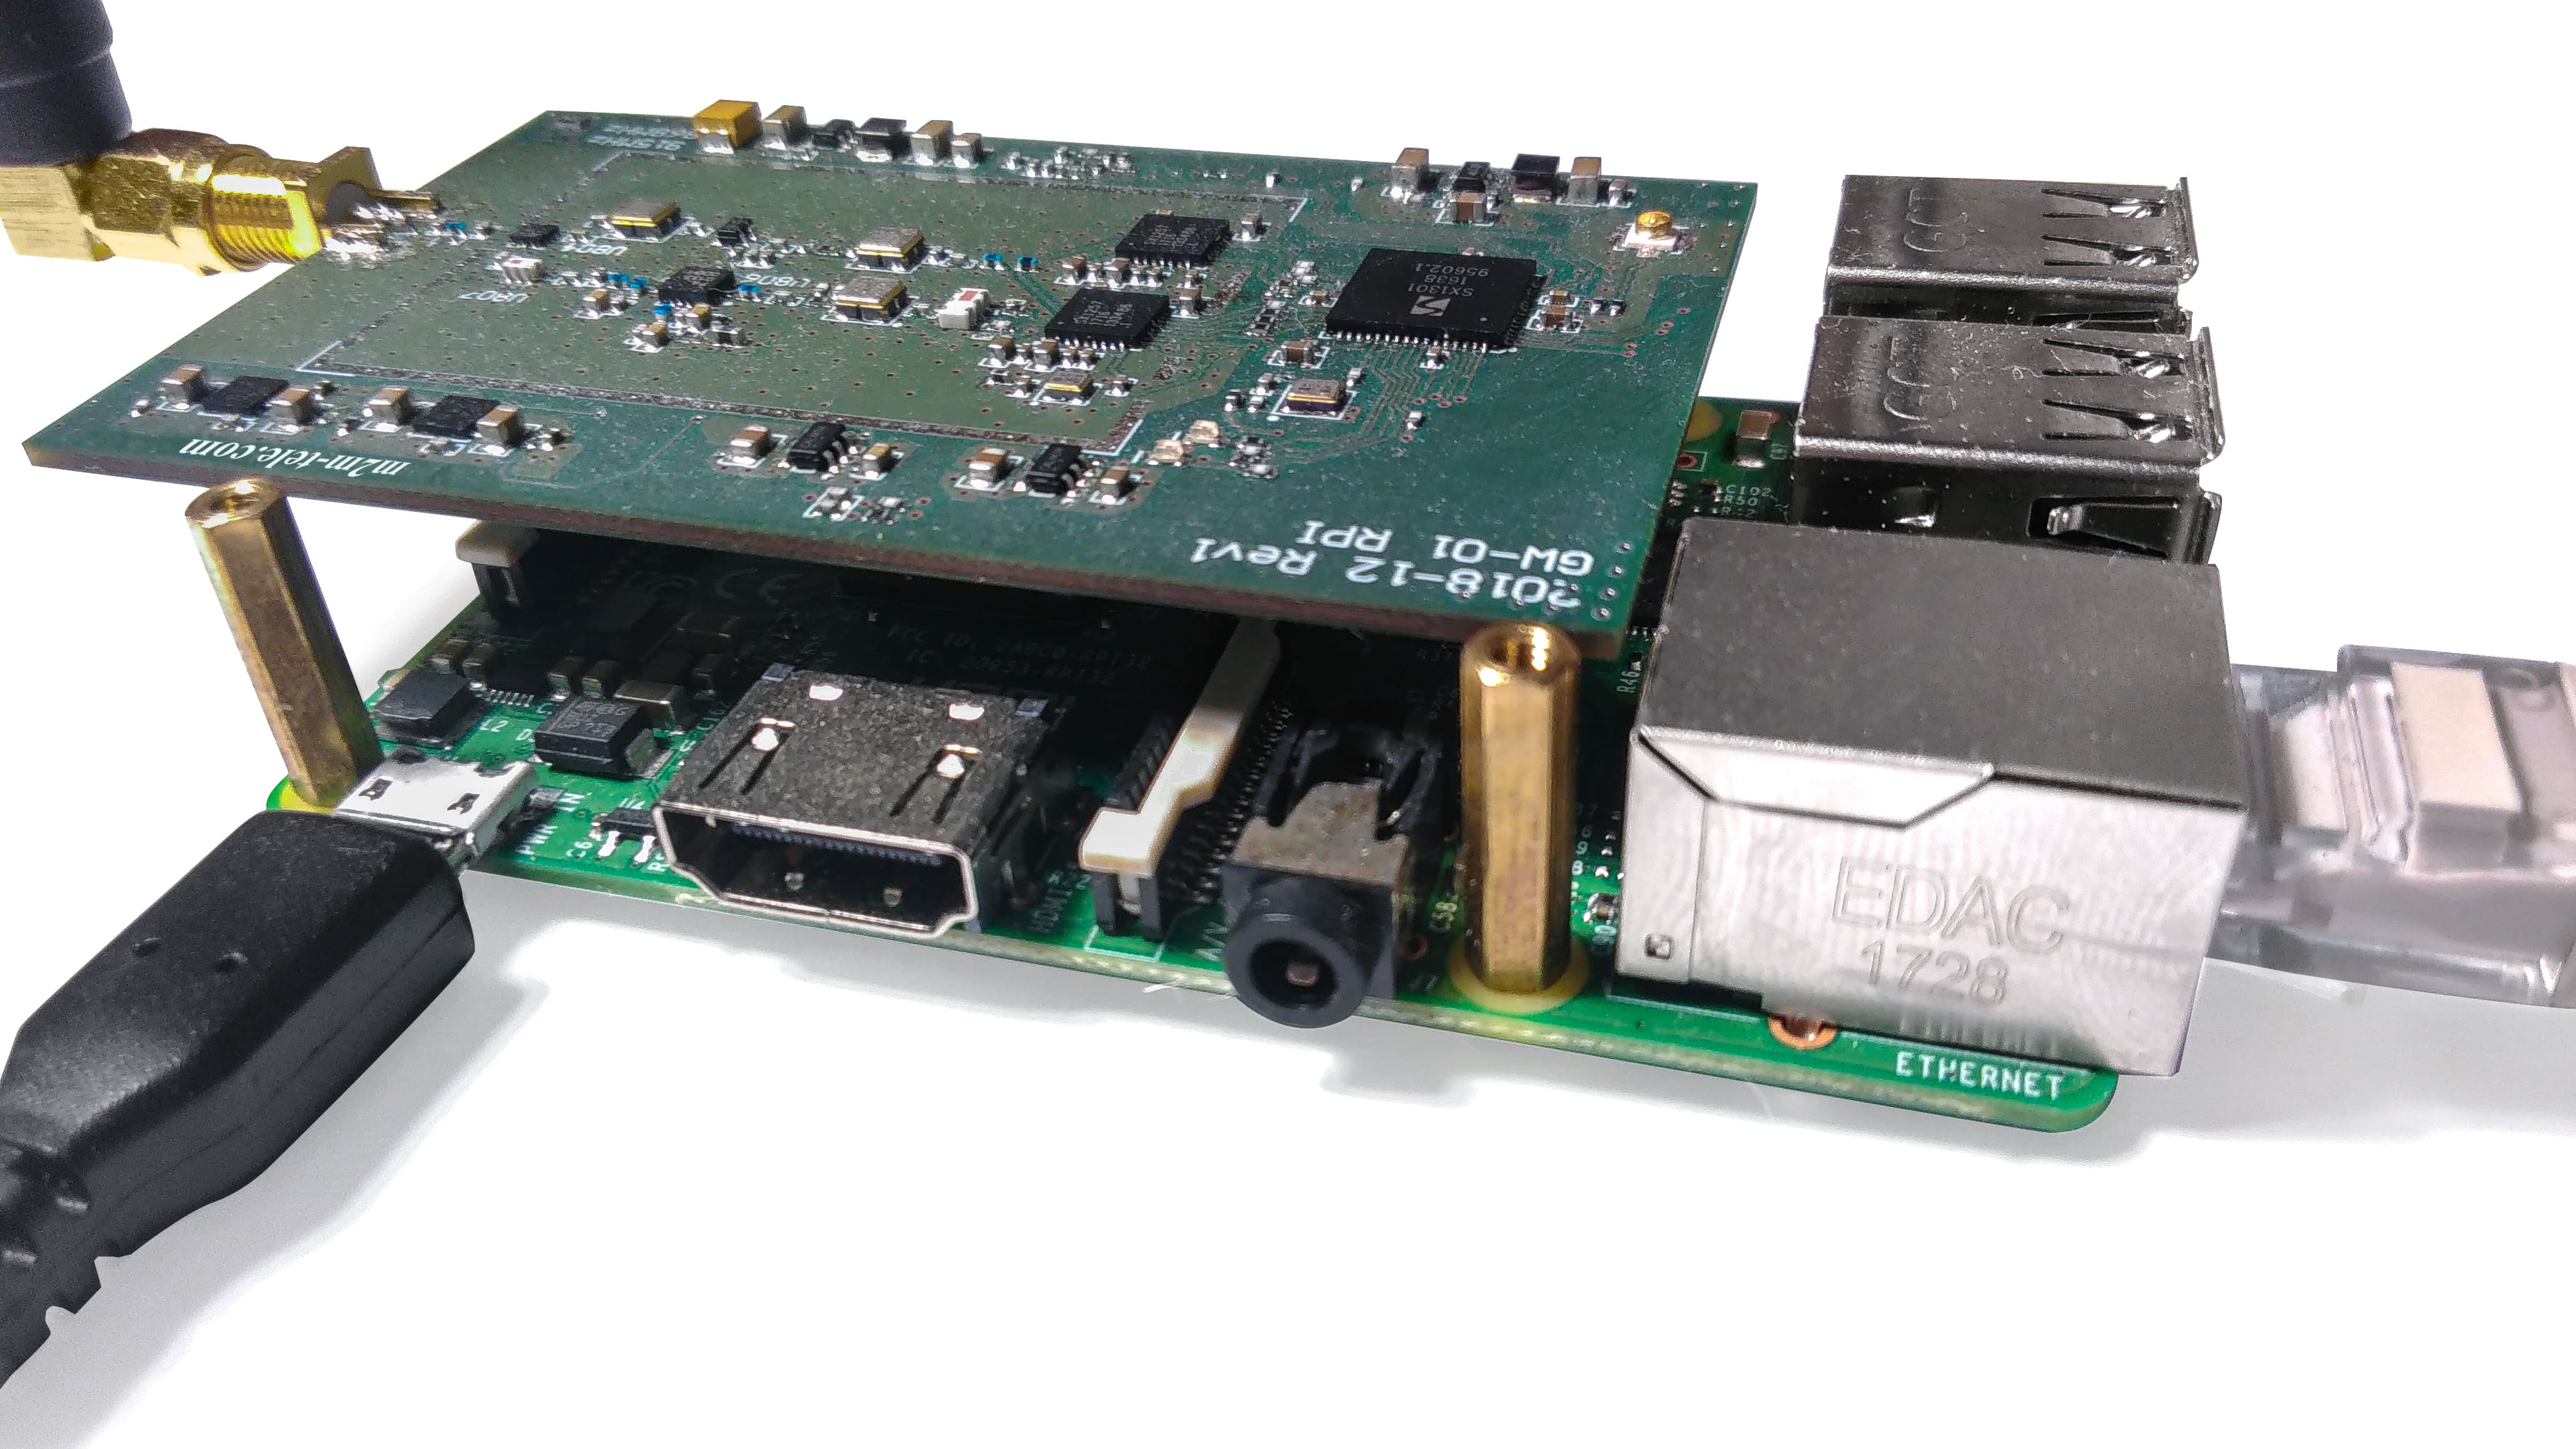
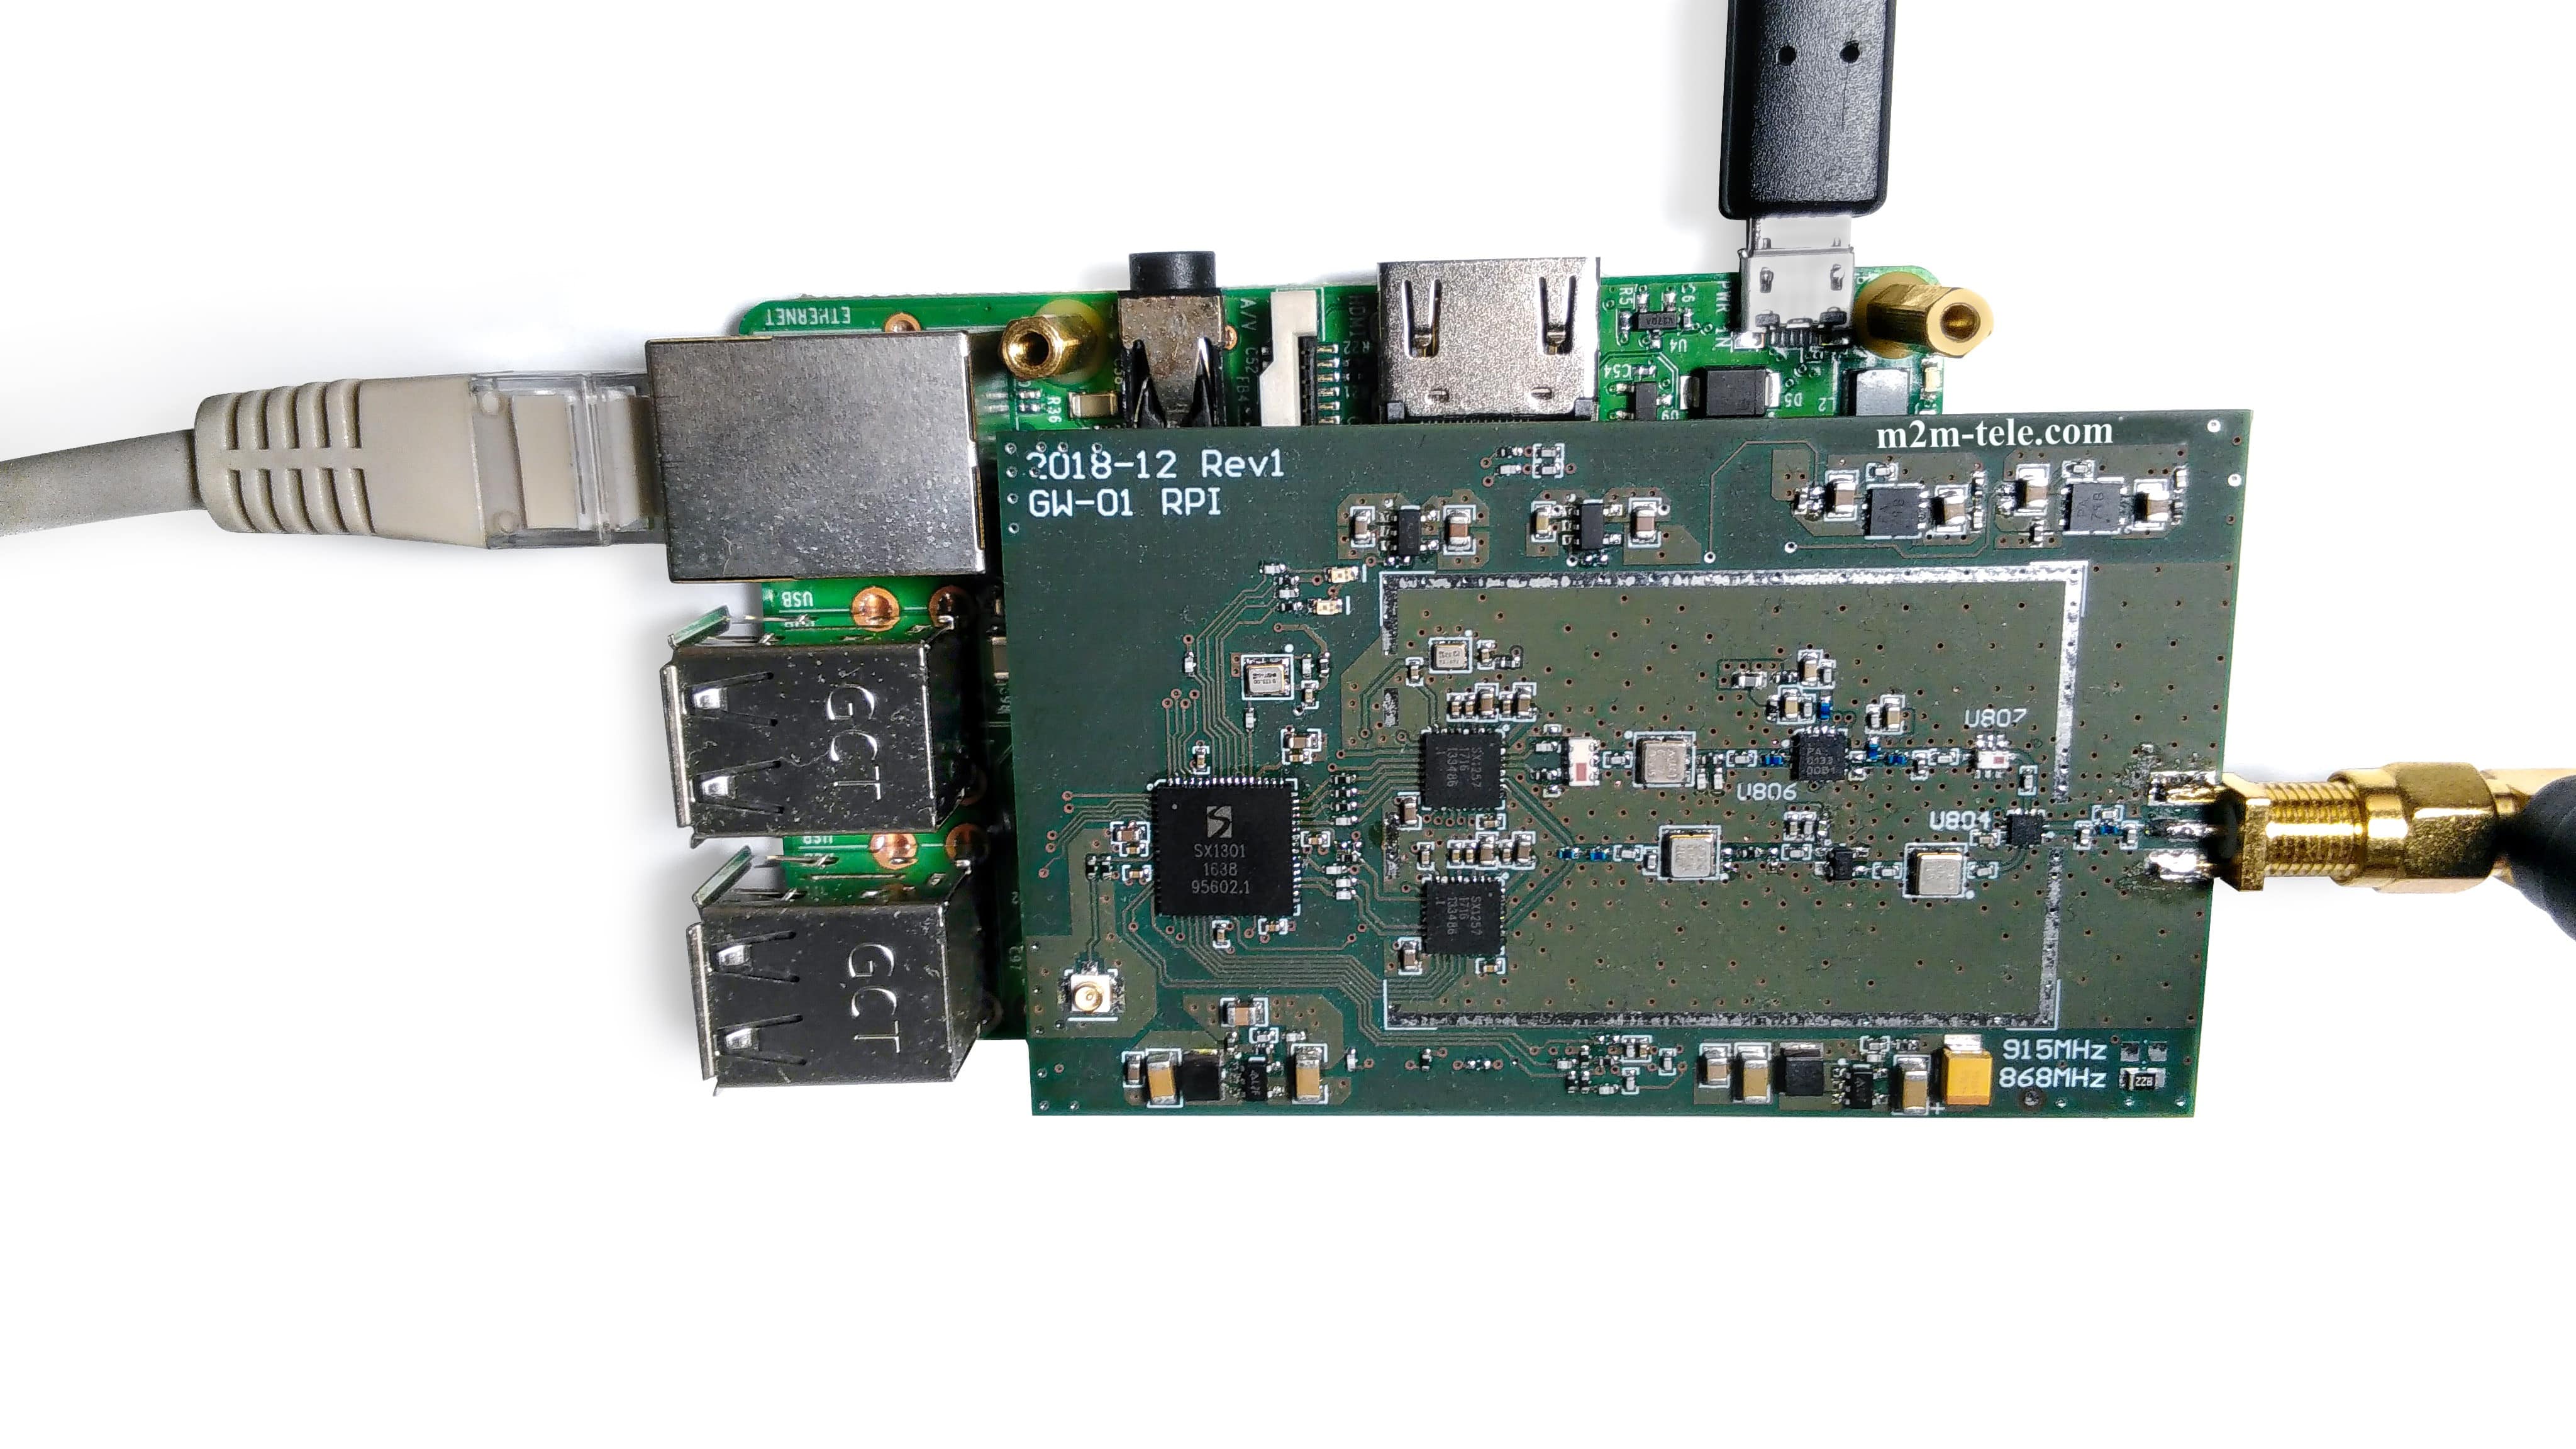
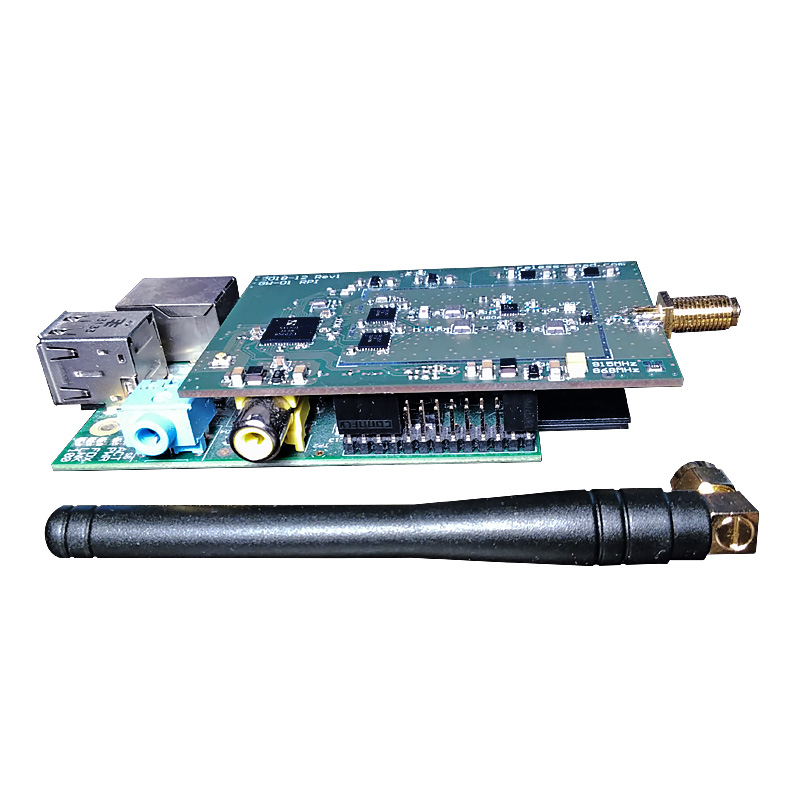
Your Raspberry pi can be equipped with low cost LoRa shield to get lora gateway.
Just plug shield to Raspberry V3 or Raspberry V2 and get development lorawan gateway based on raspberry pi:
lora raspberry pi 3:
lora raspberry pi 2:
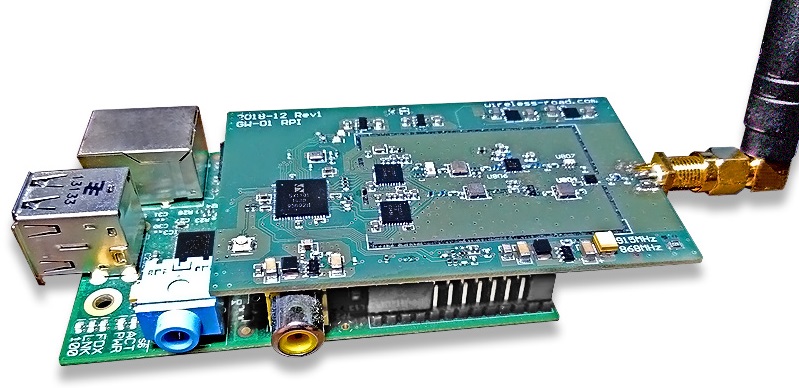
After that just insert ethernet cable, attach RF antenna and power up Rpi as usual. Connect over SSH as usual.
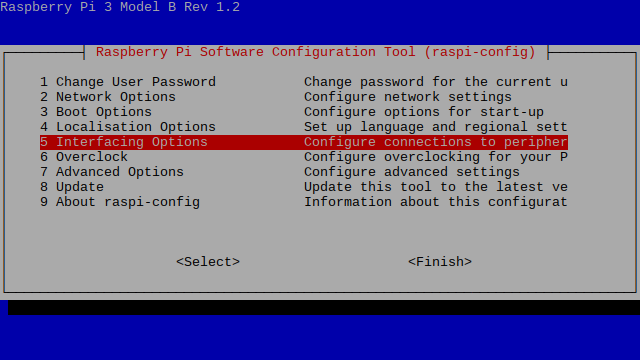
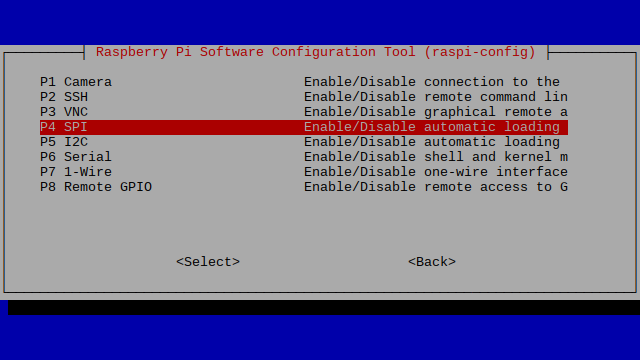
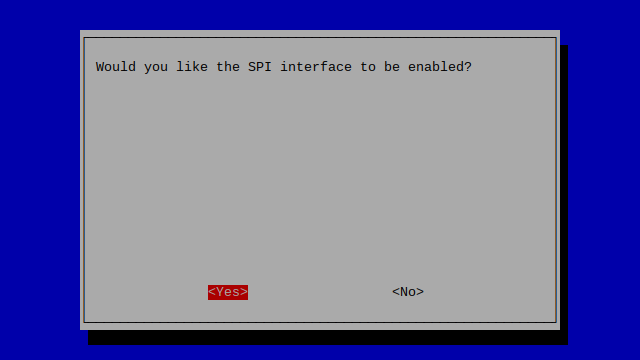
Installation.
First you need to check if SPI interface is enabled:
/dev/spidev0.0 /dev/spidev0.1
$ mkdir lora
$ cd lora
$ git clone https://github.com/Lora-net/lora_gateway.git
$ cd lora_gateway
$ make
$ git clone https://github.com/Lora-net/packet_forwarder.git
$ cd packet_forwarder
$ ./compile.sh
$ cd lora_pkt_fwd
$ nano global_conf.json
-
“gateway_ID”: “AA555A0000000000”
-
“serv_port_up”: 1700,
-
“serv_port_down”: 1700,
$ touch reset.sh
$ nano reset.sh
$ sudo chmod +x reset.sh
Running
$ sudo ./reset.sh
$ cd packet_forwarder/lora_pkt_fwd/
$ ./lora_pkt_fwd