Embedded linux development and remote debugging using Eclipse IDE
In previous post we explained ways to speed up embedded linux development process. By reducing source code compilation time (10x) and time to deliver changed code to target hardware we increased speed of development. 2-3 minutes to compile and deliver changes instead of 30-40 minutes gave us way not only grow up productivity but also made it possible to enjoy development process since very long painful routine process that used to be real torture are now performed in a matter of minutes. But there are still lack in usability of tools used to develop embedded linux source code. Absence of any IDE and ways to debug source code still makes it hard to build working processes efficient enough. In this post we describe steps we passed to start using Eclipse for C/C++ as IDE that let’s as develop source code for embedded linux and make debugging on remote hardware.
Our main repo will be used here as source code that we worked on during experiments with Eclipse. Distributive we are using is OpenWrt. But it should be quite similar for other commonly used embedded linux distributives.
So, we started from scratch. From simplest Hello world package.
Toolchain Preparation
But before it we need to get toolchain. We are compiling them from source code so clone them:
$ cd imx6ull-openwrt
and start compilation of any existing configuration with only goal – is compile toolchain that will be used later for compilation and debugging source code we will debug remotely:
$ ls -la staging_dir/toolchain-arm_cortex-a7+neon-vfpv4_gcc-7.5.0_musl_eabi/bin/
…
-rwxr-xr-x 1 al al 1130880 авг 6 16:27 arm-openwrt-linux-muslgnueabi-addr2line
-rwxr-xr-x 2 al al 1168544 авг 6 16:27 arm-openwrt-linux-muslgnueabi-ar
-rwxr-xr-x 2 al al 2071544 авг 6 16:27 arm-openwrt-linux-muslgnueabi-as
-rwxr-xr-x 2 al al 4619792 авг 6 16:30 arm-openwrt-linux-muslgnueabi-c++
-rwxr-xr-x 1 al al 1129960 авг 6 16:27 arm-openwrt-linux-muslgnueabi-c++filt
-rwxr-xr-x 1 al al 4613176 авг 6 16:30 arm-openwrt-linux-muslgnueabi-cpp
-rwxr-xr-x 1 al al 46256 авг 6 16:27 arm-openwrt-linux-muslgnueabi-elfedit
-rwxr-xr-x 2 al al 4619792 авг 6 16:30 arm-openwrt-linux-muslgnueabi-g++
-rwxr-xr-x 2 al al 4609384 авг 6 16:30 arm-openwrt-linux-muslgnueabi-gcc
…
-rwxr-xr-x 1 al al 1130816 авг 6 16:27 arm-openwrt-linux-muslgnueabi-strings
-rwxr-xr-x 2 al al 1287552 авг 6 16:27 arm-openwrt-linux-muslgnueabi-strip
…
That utilities will be used for cross compilation.
Hello world from command line
Let’s create simple helloworld program:
$ touch package/helloworld/helloworld.c
$ cd package/helloworld/src
Then open helloworld.c using any editor and enter following:
#include <stdio.h>
#include <stdlib.h>
#include <unistd.h>
#include <string.h>
int main(int argc, char **argv) {
fprintf(stdout, “Hello world! \r\n”);
return 0;
}
Then compile source code and run it:
$ gcc -o helloworld helloworld.o
$ ./helloworld
Hello world!
Next we will compile it for target hardware:
$ ../../../staging_dir/toolchain-arm_cortex-a7+neon-vfpv4_gcc-7.5.0_musl_eabi/bin/arm-openwrt-linux-muslgnueabi-gcc -c -o helloworld.o helloworld.c -Wall
$ ../../../staging_dir/toolchain-arm_cortex-a7+neon-vfpv4_gcc-7.5.0_musl_eabi/bin/arm-openwrt-linux-muslgnueabi-gcc -o helloworld helloworld.o
Except and environment variable the only difference between compilation for host and cross compilation is usage of specific toolchain. Copy resulted executable to target machine using scp:
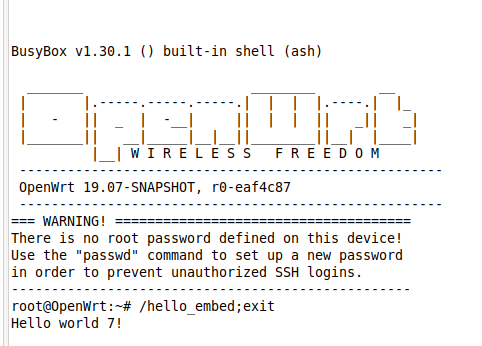
where 192.168.31.99 – is IP address of target and run it from target machine’s console:
Hello world
Looks pretty simple.
So next step is do same things using Eclipse IDE.
Hello world using Eclipse
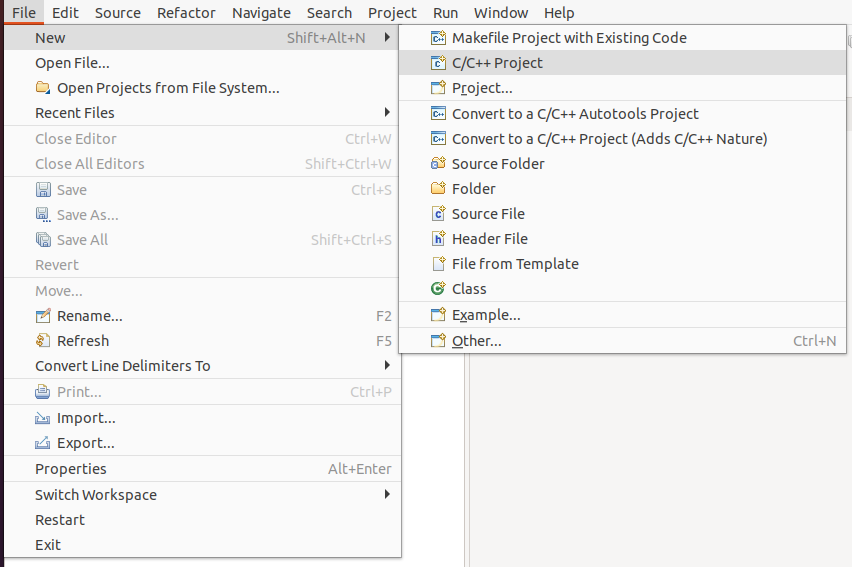
Open eclipse and create simple C/C++ Project:
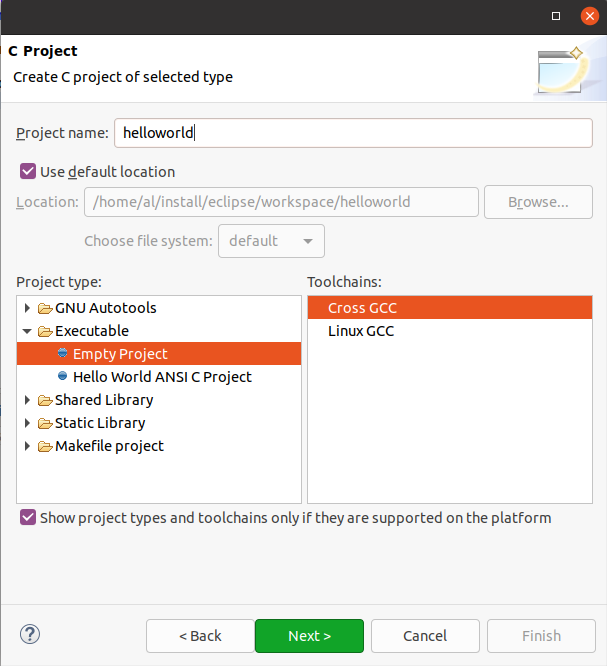
Select Cross GCC toolchain enter project name and press Next:
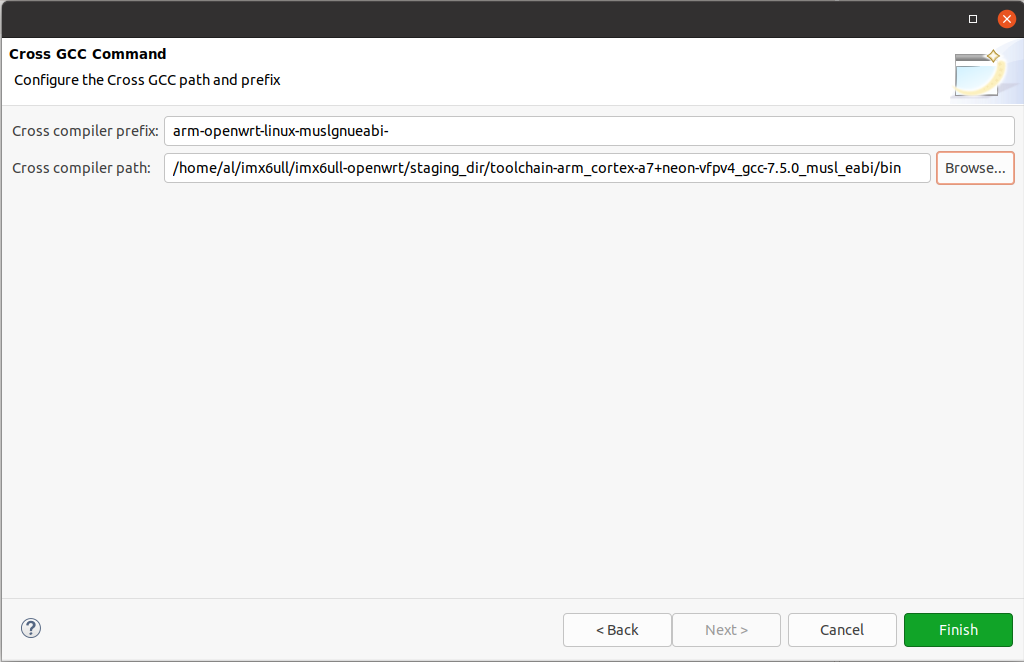
Enter arm-openwrt-linux-muslgnueabi- to prefix field and path to staging_dir/toolchain-arm_cortex-a7+neon-vfpv4_gcc-7.5.0_musl_eabi/bin folder we got on previous chapter:
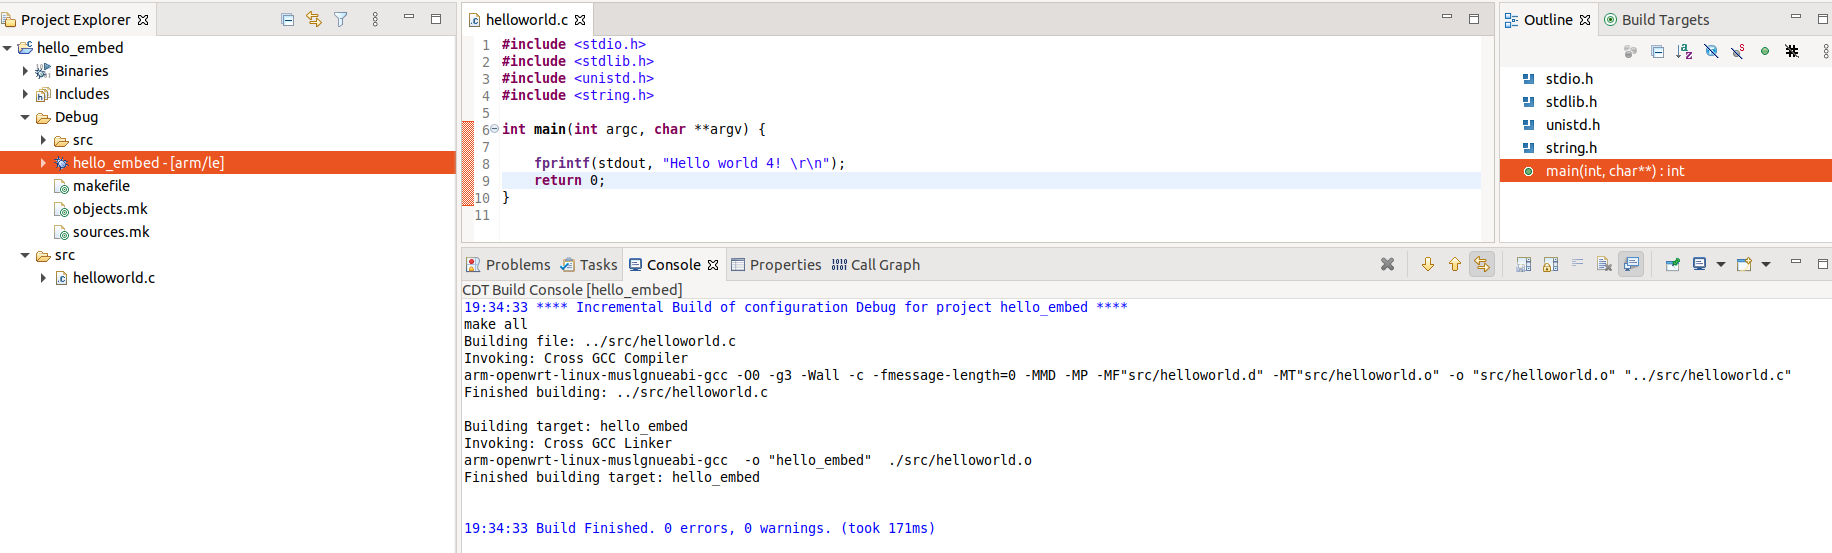
In generated project create src folder and helloworld.c file. Then type same code from previous chapter and compile project by pressing Project –> Build All:
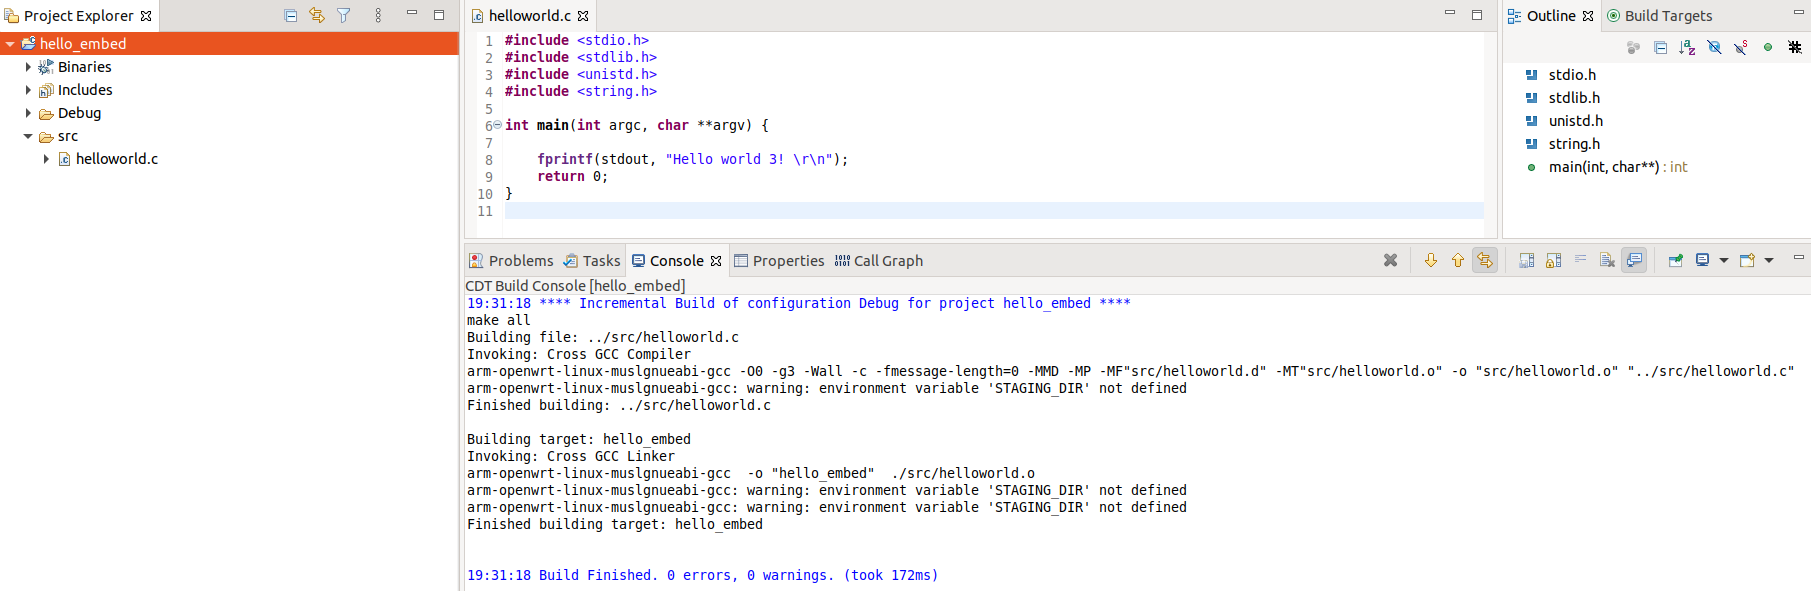
Again, no STAGING_DIR environment variable is defined.
Make mouse right click on the project root folder then: Properties –> C/C++ Build –> Environment –> Add to add STAGING_DIR variable with same path to staging_dir folder in source code we cloned before:
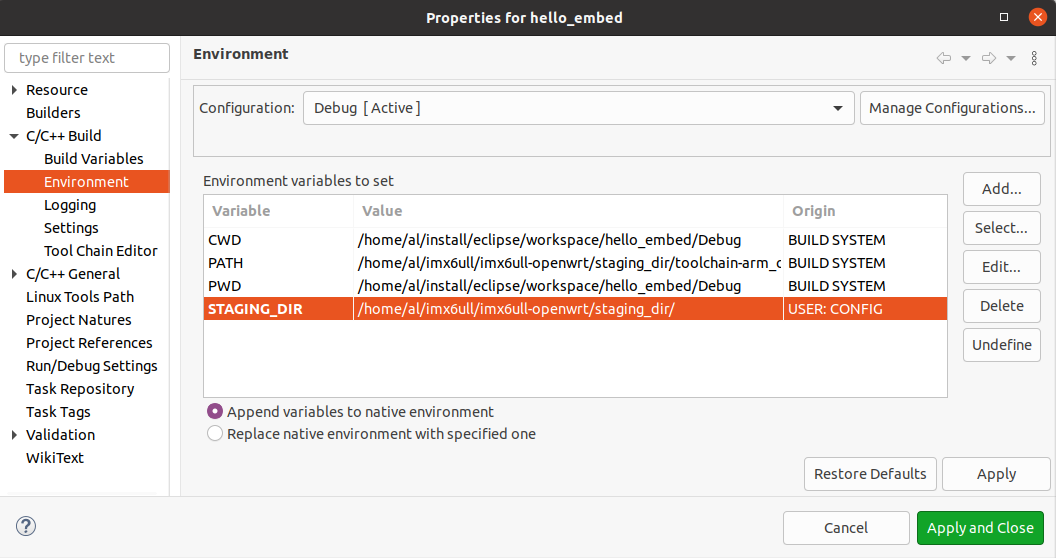
Try to recompile the project again. Now it should be ok:
Copy resulted executable to target hardware and run it same way we did it before:
Hello world
Great! Next we have to integrate resulted binary delivery to target hardware in Eclipse. But we have to recompile kernel image on target device to include sftp server and gdbserver in device image.
Image recompilation
type in the root folder of source code we cloned before:
and enable openssh-sftp-server:
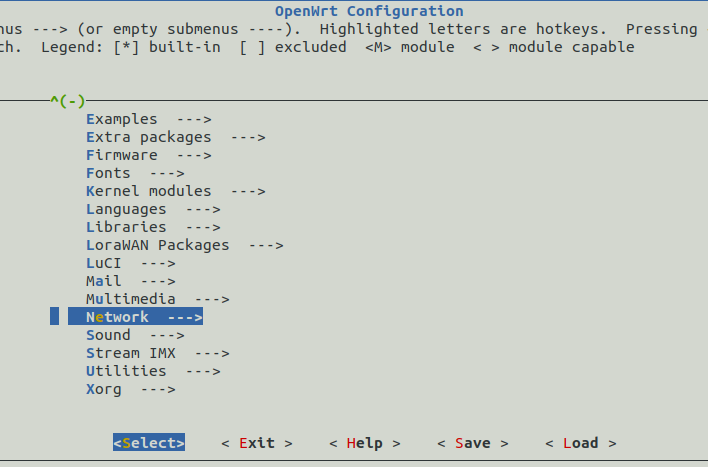
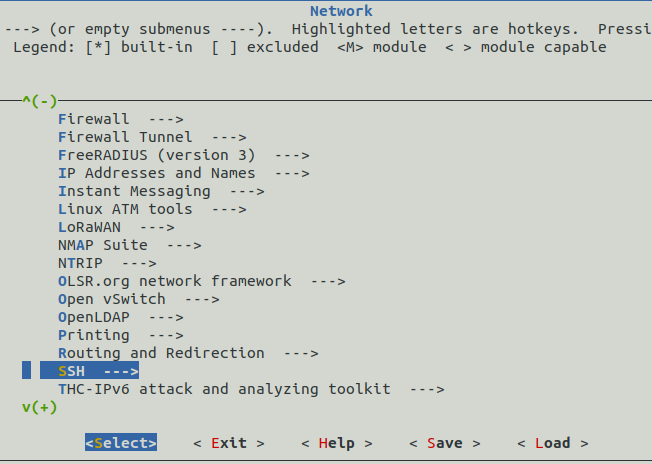
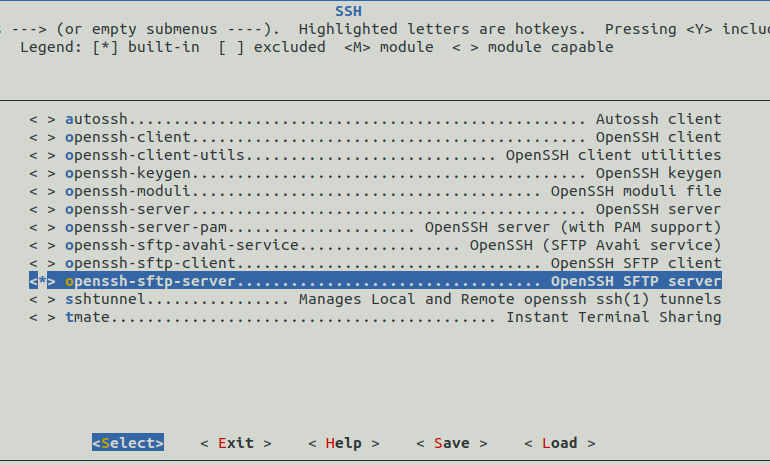
by pressing Y.
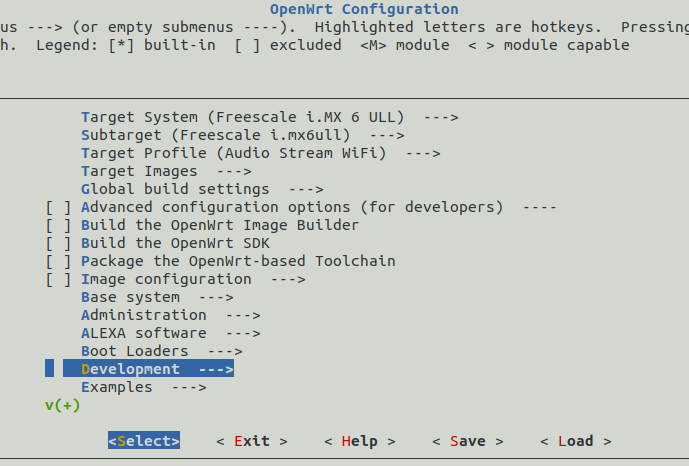
Then we have to enable gdbserver:
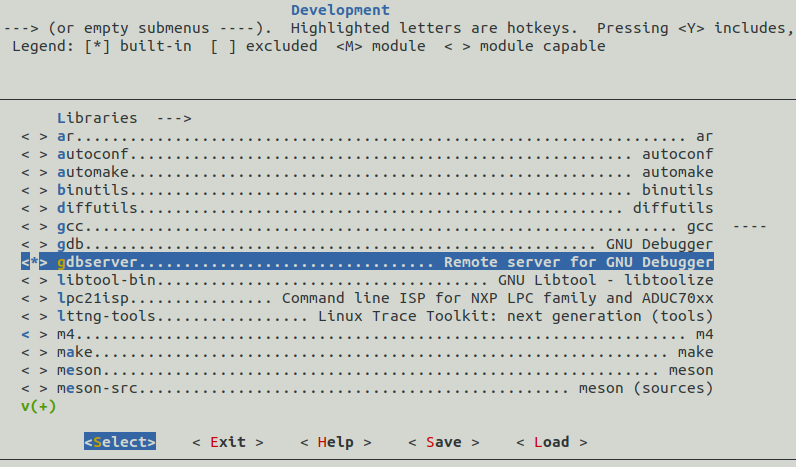
Exit and save changes.
Then recompile image:
Here we call make instead of ./compile.sh to keep changes we made in .config file used as configuration file during compilation process. After that you have to update firmware on target device using one of the possible ways: sysupgrade utility or nfs.
After that everything ready for final steps of integration Eclipse with remote device.
Eclipse configuration. SFTP.
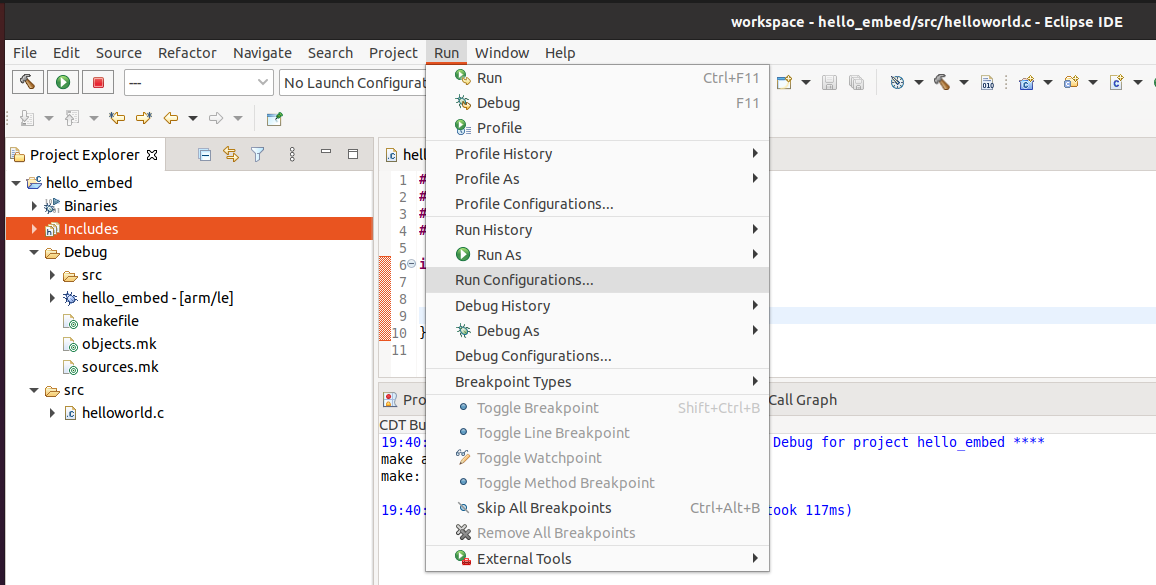
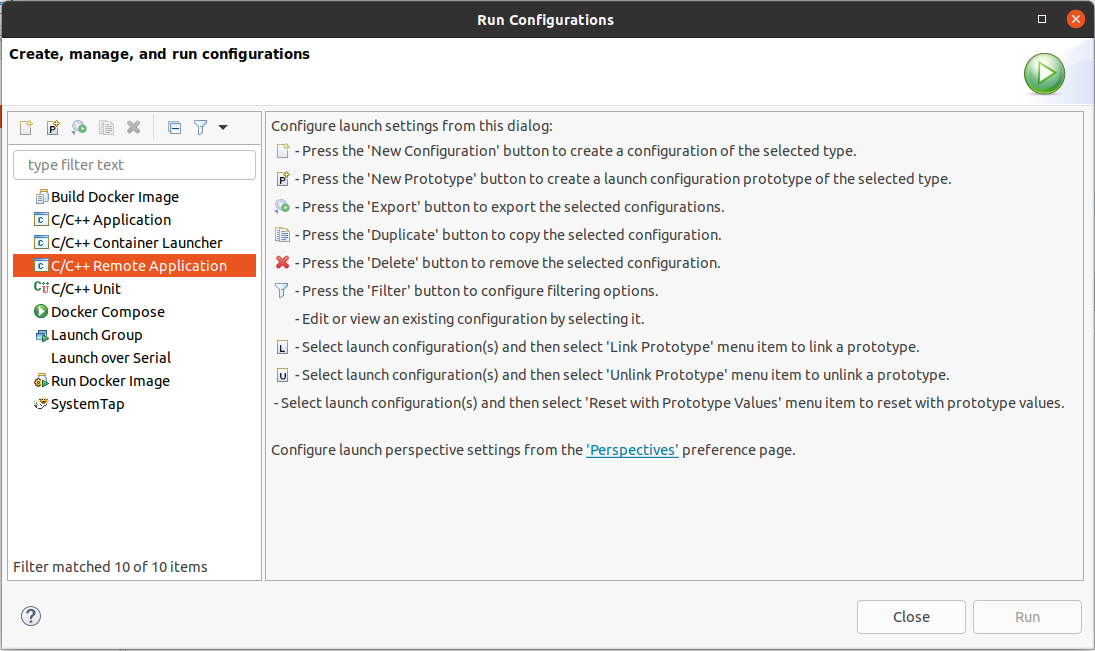
First we will configure Eclipse to run resulted executable right on remote hardware by accessing it using SFTP. Press Run –> Run Configurations for that:
Then create C/C++ Remote Application by double click to C/C++ Remote Application row:
and connection to target device by pressing to New button in front of connection option:
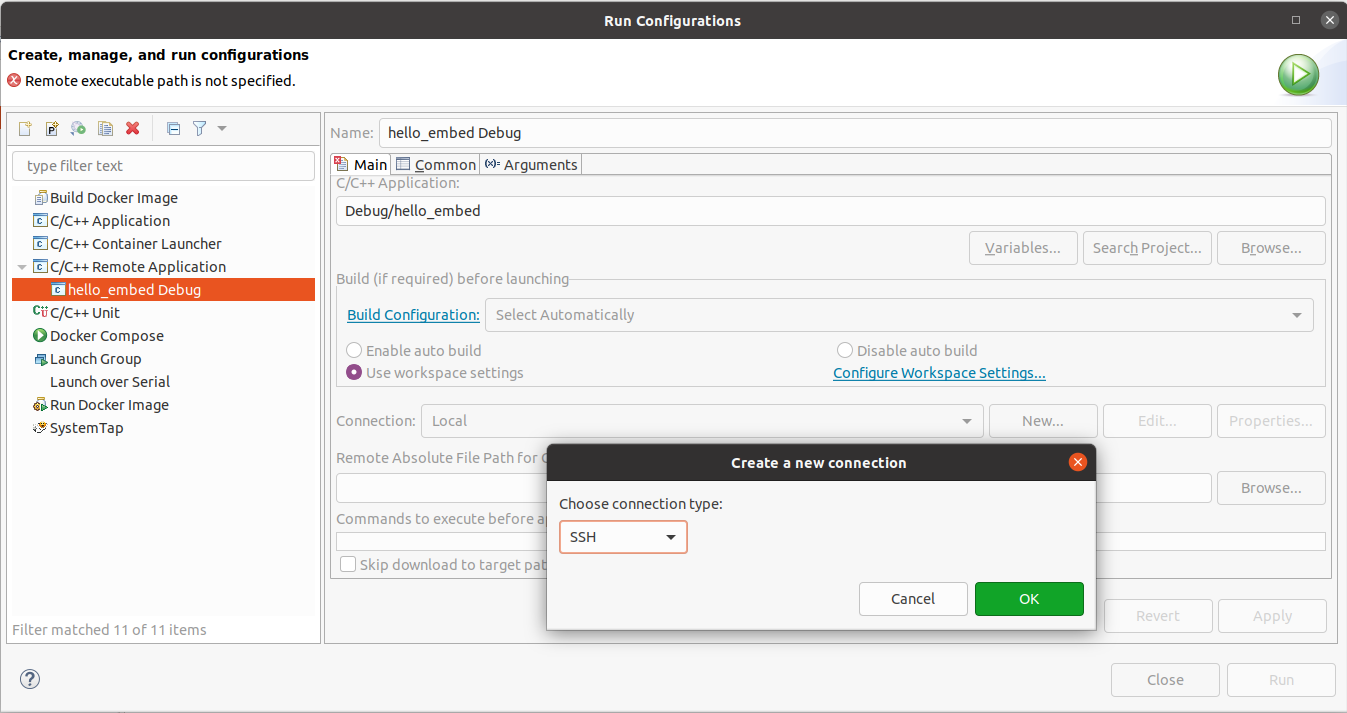
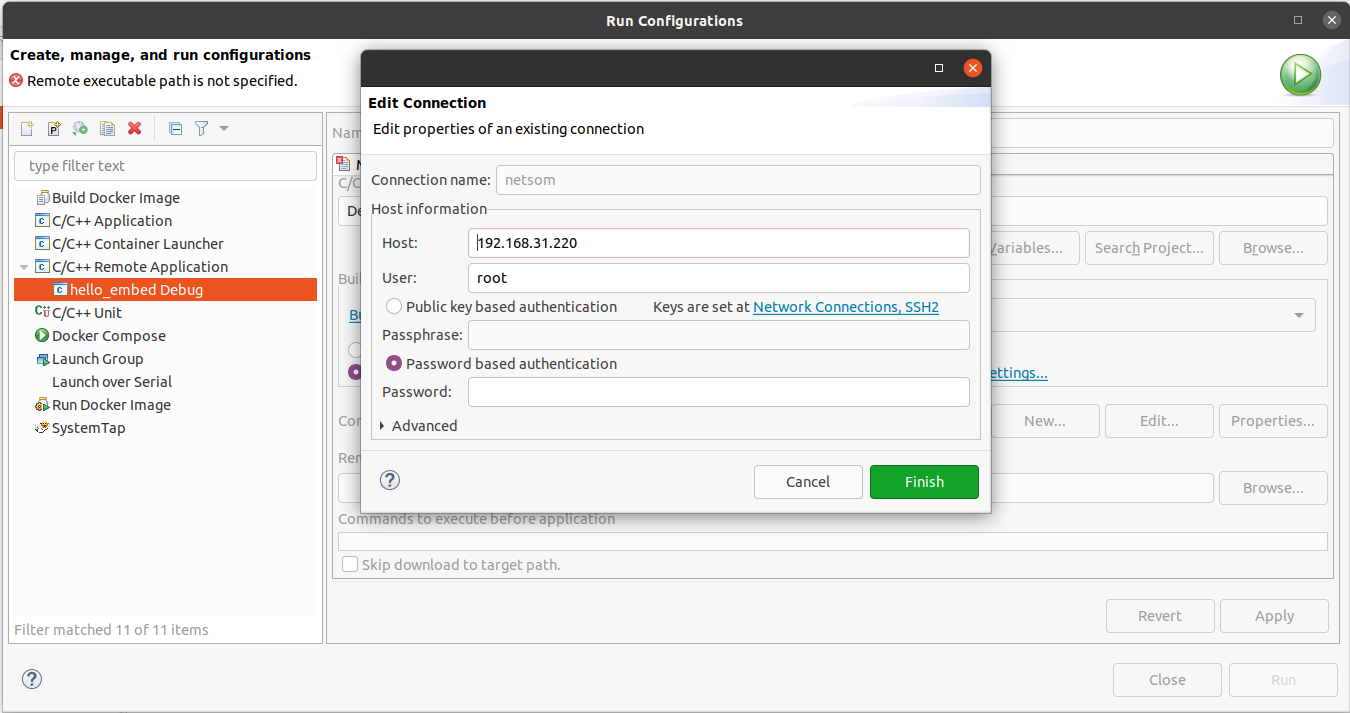
Select SSH as connection type and provide IP address of target device. Select password based authentification (no password by default in our source code) and press Finish:
Next we need to provide path on remote hardware application executable to be copied to. Press to Browse button:
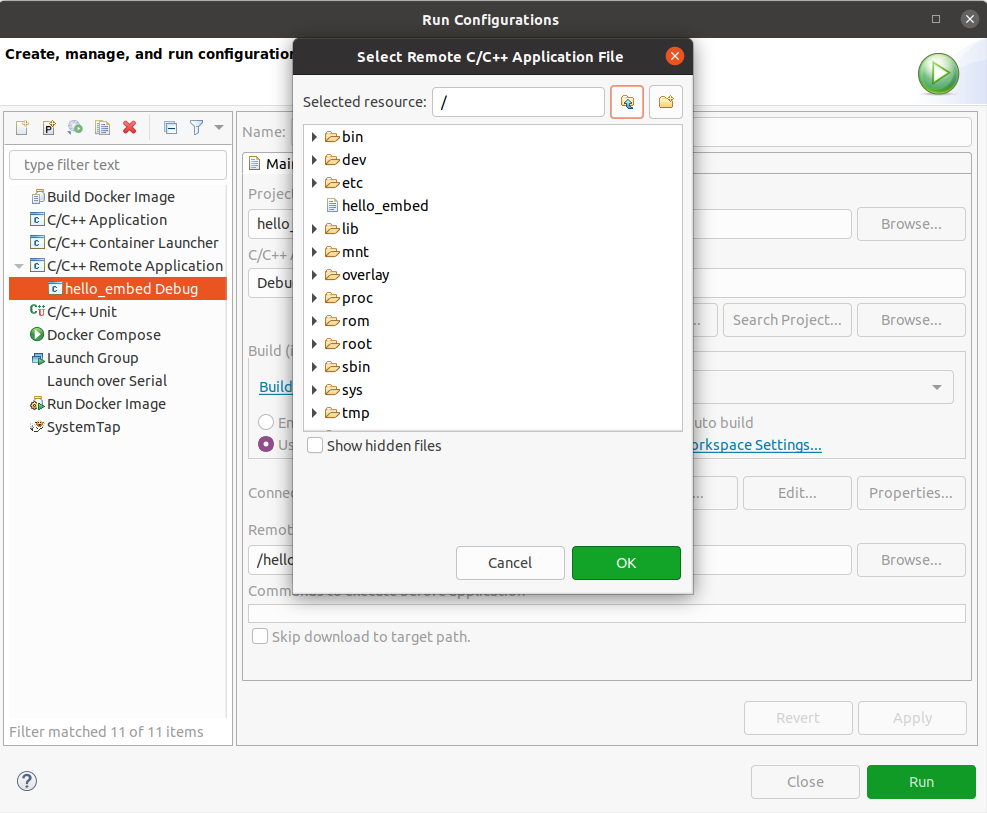
and select path.
So now we can press to Run button to run application on target machine. You should see something like this in Console window of Eclipse:
Switch to target console. Application binary file is there:

Eclipse configuration. Remote debugging.
Install gdb-multiarch utility on host machine:
Then open Debug configuration window in eclipse:
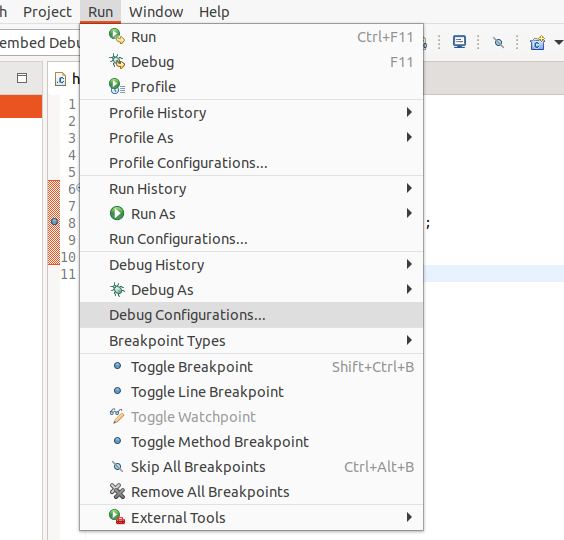
It should be pre-configured on previous steps. So you just have to switch to Debugger tab:
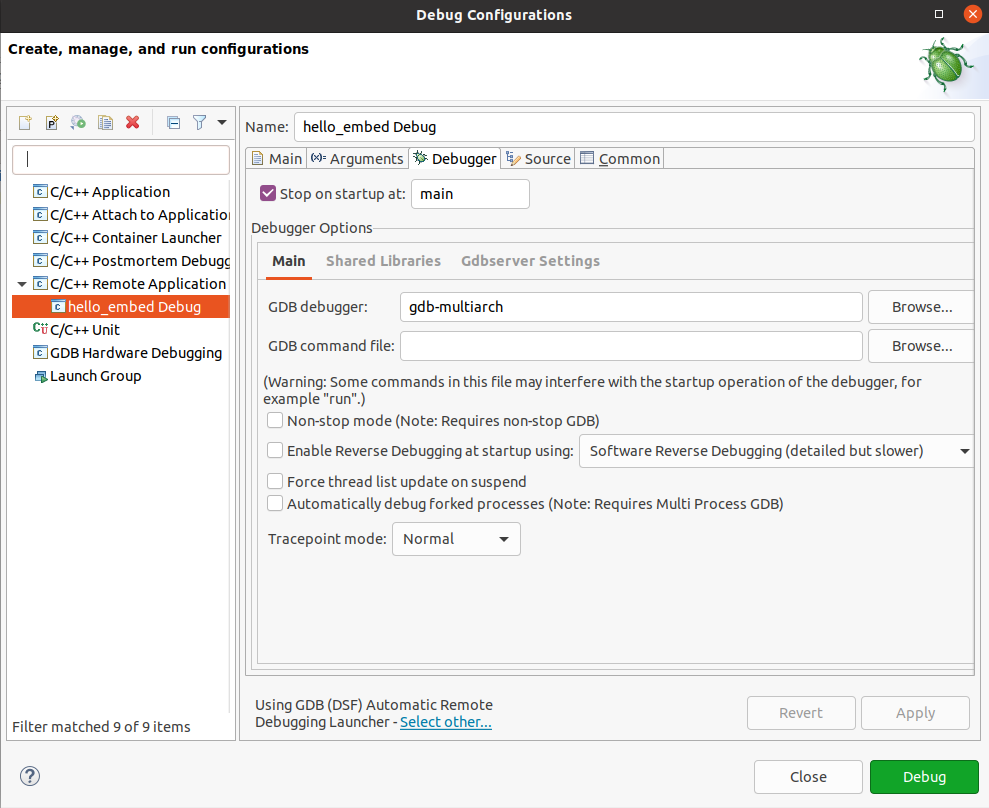
Here you need just set GDB debugger field to gdb-multiarch and clean GDB command file field. Everything is ready. Press to Debug button. Eclipse should ask for switching to Debug perspective:
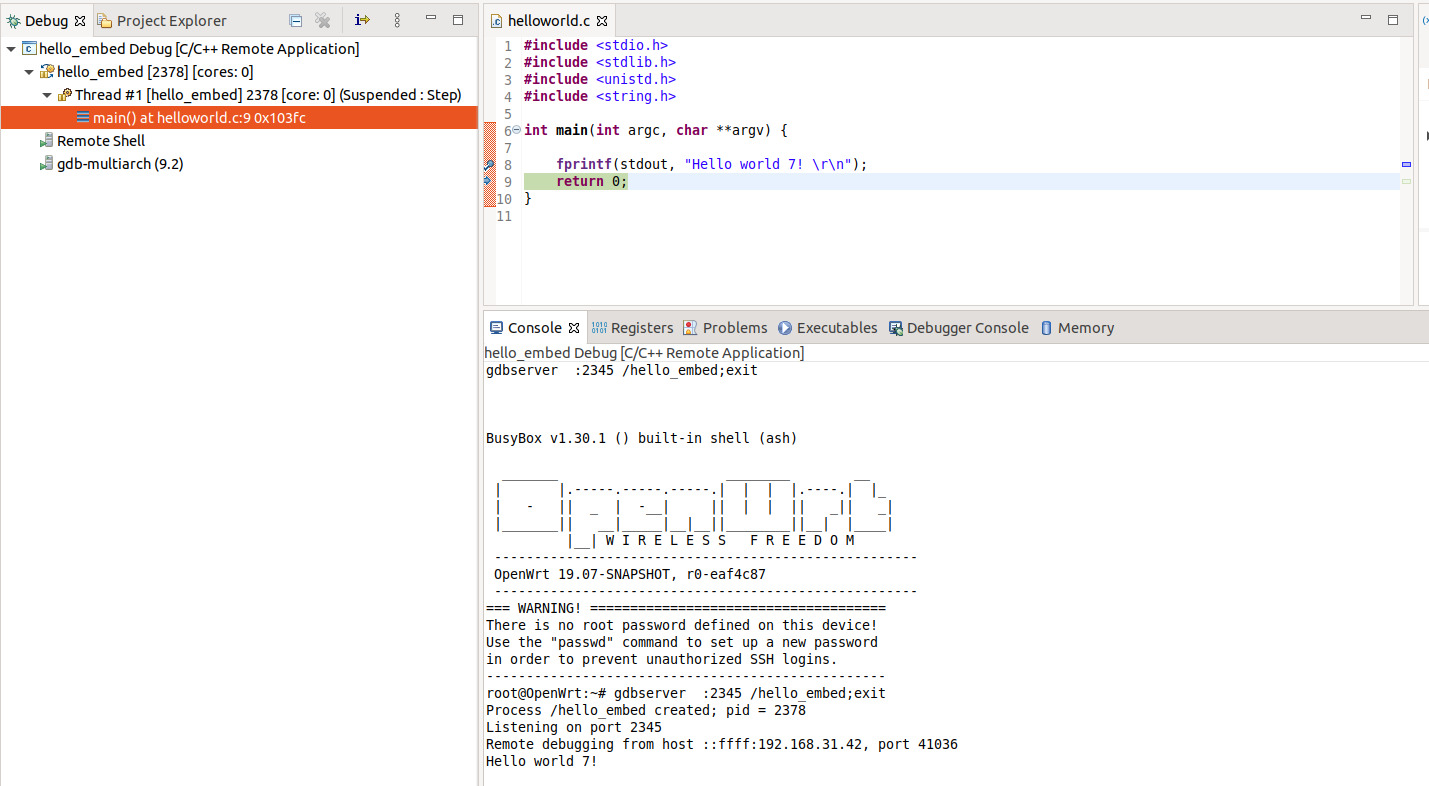
It is working! We can walk through the code line by line!
In next chapter we will debug Makefile based OpenWrt’s package.